Installing a home alarm system yourself can save hundreds in professional installation fees while giving you complete control over your home’s security. Whether you’re upgrading an existing system or building from scratch, understanding the components and installation process makes the project manageable for most homeowners. This guide walks you through selecting the right equipment, planning your layout, and connecting everything properly, no prior electrical experience required. We’ll cover what works, what to avoid, and when to call a pro.
Table of Contents
ToggleKey Takeaways
- Installing a home alarm system yourself can save $500–$2,000 in professional installation fees while maintaining complete control over your home’s security design and placement.
- Proper sensor placement is critical—mount door and window sensors on perimeter entry points, motion detectors in hallways and high-traffic areas, and keep them aligned within 1 inch apart for reliable alarm system activation.
- The installation process requires mounting the control panel near your main entrance on a level surface, running wire along studs without interference from electrical lines, and testing each component in test mode before going live.
- Motion detectors should be positioned 6–8 feet high in corners for optimal coverage, away from heat sources and pets over 50 pounds to prevent false alarms during normal use.
- Comprehensive testing in test mode—checking door sensors, motion detectors, sirens, keypad functionality, and backup battery operation—catches 90% of installation mistakes before the system runs 24 hours in live mode.
- Document all wiring connections, zone assignments, and keep manufacturer manuals accessible for future troubleshooting and to help technicians understand your alarm system configuration if needed.
Understanding Your Alarm System Components
Essential Hardware and What Each Part Does
Every alarm system has five core pieces: the control panel (the brain), door and window sensors (magnetic contacts), motion detectors, the keypad (your interface), and the siren or alarm speaker. Some systems add glass break sensors, environmental sensors (smoke, carbon monoxide), or video verification cameras.
The control panel processes signals from all sensors and triggers responses, it’s typically the size of a small circuit breaker box and mounts on an interior wall near your main entry. Door and window sensors consist of two parts: a magnet mounted on the moving part (door or window) and a switch contact on the frame. When they separate, the circuit breaks and triggers an alarm.
Motion detectors use passive infrared (PIR) or microwave technology to sense movement. Wireless versions are easier to install but require battery monitoring: hardwired versions run on your system’s power and don’t fail suddenly.
The keypad lets you arm, disarm, and monitor the system. Modern keypads are touchscreen or keypunch-style: wireless versions use radio signals. Placement matters, install it near your most-used entry for convenience.
The siren can be indoor (80–120 decibels) or outdoor (95+ decibels). Indoor sirens are simpler to install: outdoor models deter intruders but require weatherproof housings and wired power from your panel.
Many homeowners start with an easy home alarm system to understand their needs before upgrading. Understanding these basics prevents installation mistakes and helps you troubleshoot later.
Planning Your Installation Layout
Choosing Optimal Sensor Placement and Coverage
Proper placement determines whether your system actually protects your home. Start by mapping entry and exit points: every exterior door, window, and sliding glass door should have a sensor. These are your perimeter sensors, they’re the first line of defense.
For doors, mount the magnet on the moving part and the contact on the fixed frame. Keep them parallel and within 1 inch of each other when the door closes. On windows, the same rule applies: magnet on the sash, contact on the frame.
Motion detectors go in hallways, living rooms, and other high-traffic interior spaces, but not in rooms with pets weighing more than 50 pounds, as they trigger false alarms. Aim them across doorways and down corridors rather than at windows or walls. Keep them 6–8 feet high and away from heat sources (vents, direct sunlight), which confuse the sensor.
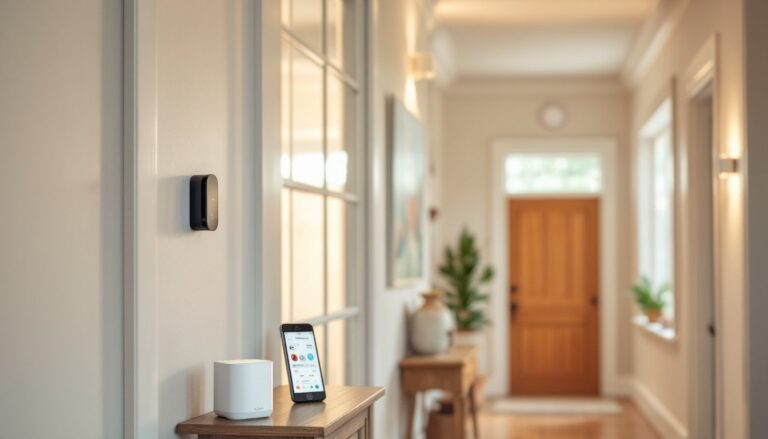
Your control panel should mount near your main entrance, typically on a wall 48–60 inches from the floor. This placement lets you arm the system as you leave and disarm it when you return. Keep it away from extreme temperatures and high-moisture areas like bathrooms.
The keypad goes at a secondary entrance or in a common area. Some systems support multiple keypads, one downstairs and one upstairs, for example. Test sightlines: motion detectors work best with clear views to entry points. For a Honeywell Home Alarm System, consult the layout guide, different models have different coverage patterns.
Draw a floor plan and mark each sensor, panel, and keypad location before purchasing equipment. This prevents buying too few (or too many) components and saves time during installation.
Step-By-Step Installation Process
Wiring, Mounting, and Connecting Your System
Prepare your workspace. Before touching anything, read the manufacturer’s manual for your specific model, wiring diagrams vary. Gather tools: a stud finder, level, drill or screwdriver, wire strippers, electrical tape, and crimpers (for hardwired connections). Cut power to any existing alarm circuits at your breaker panel if upgrading.
Mount the control panel first. Find a stud using a stud finder, this ensures a rock-solid foundation. Drill pilot holes (slightly undersized, so screws don’t strip), then secure the panel with the provided lag bolts or screws. Ensure it’s level using a 2-foot level: crooked mounting looks unprofessional and strains connections.
Run wire runs before mounting sensors. For hardwired systems, you’ll run 22-gauge alarm wire (four-conductor is standard) from the panel to each sensor location. Drill small holes through studs and frame members, never force wire into corners or pinch it in door frames. Route wire along studs or ceiling joists, securing it every 12 inches with cable clips (Home Depot stocks them for about $0.50 each). Avoid running alarm wire alongside 120V electrical wire: it causes interference.
For wireless systems, skip the wiring and move to mounting. Mount door and window sensors: Install the magnet (smaller piece) on the moving part and the switch contact on the frame. Use the provided adhesive strips or small stainless steel screws. Ensure they’re aligned and spaced correctly per the manual, typically 1/4 inch apart.
Mount motion detectors at a corner where they can “see” the most entry routes. A motion detector in a hallway catches anyone entering from a doorway: placed in a corner, it covers more floor area. Use drywall anchors if you’re not hitting a stud. Angle the detector slightly downward (about 10 degrees) for better coverage.
Connect hardwired sensor leads to the panel using terminal strips or screw terminals. Strip about 1/4 inch of insulation from each wire, insert into the terminal, and tighten the screw. Some panels use quick-connect terminals, just insert and push until you hear a click.
Mounting the keypad and siren comes last. The keypad typically mounts near your main entry at about 48 inches high. The siren goes high and visible, thieves don’t want to announce their presence, so a prominent siren is a deterrent. If outdoor, use a weatherproof enclosure and seal all openings with silicone caulk.
Connect backup batteries per the manual, this keeps your system armed during power outages. A basic home alarm system usually includes a 12V battery: larger systems may need a secondary battery in the panel itself.
Testing and Troubleshooting Your New System
Verify Every Component Before Going Live
Don’t rush testing, this step catches 90% of installation mistakes. Start with a full system test per the manual. Most systems have a “test mode” that lets you trigger sensors without sounding the siren.
Test each door and window sensor by opening and closing while monitoring the keypad. You should see each zone register on the display. If a sensor doesn’t show up, check the wire connections, a loose terminal is the most common culprit. Reopen the terminal, reseat the wire firmly, and tighten the screw.
Test motion detectors by arming the system and walking through detected areas. You should hear a beep or see a light on the keypad confirming motion. If one detector is silent, move closer to verify it’s actually sensing. Some detectors have a sensitivity dial, adjust it if the unit detects too much or too little movement. Birds outside windows sometimes fool PIR detectors, so recalibrate if you get false alarms from a certain direction.
Test the siren by triggering it manually (press the alarm button on the keypad if it has one, or open a sensor while armed). The siren should wail at full volume. If it’s weak or silent, check power connections to the siren and verify it’s getting 12V from the panel.
Test the keypad by arming and disarming with the correct PIN code. Try an incorrect code, the system should reject it. Verify the display is bright and responsive.
Check backup battery by unplugging the panel from 120V power. The system should stay armed and functional: the keypad should still display and respond. After a minute, plug power back in. The panel may beep to confirm it’s back online, this is normal.
Common troubleshooting issues: If a wireless sensor isn’t communicating, move it closer to the panel temporarily to rule out signal range problems (typical range is 100 feet through drywall). If a hardwired zone acts up, disconnect both wires from that sensor at the panel, then connect them again, a loose connection often causes intermittent faults. If the panel won’t boot up, check that the backup battery is installed correctly (positive and negative terminals match the diagram).
According to HomeAdvisor’s 2025 data, professional installers charge $500–$2,000 for full system setup: DIY installation saves that cost but requires patience during testing. Document everything: take photos of wiring connections, write down zone assignments, and keep the manual handy. This helps if you need to troubleshoot later or explain the system to a technician.
Once all zones respond correctly and the siren tests at full volume, arm the system and let it run for 24 hours in live mode. If no false alarms occur, your installation is solid. If random zones trigger, revisit sensor placement and wire security, wind moving a sensor, vibration from traffic, or loose wire connections are typical culprits. A smart alarm system with remote monitoring lets you test from your phone, which is handy for troubleshooting from different rooms.