A central alarm system is one of the most practical investments a homeowner can make. Unlike scattered door sensors with no coordination, a central alarm system ties everything together, every window, every door, every potential entry point, into a single, unified defense. Whether you’re protecting a single-story ranch or a multi-level home, understanding how a central alarm system works and what goes into installation helps you make smart choices about your home’s security. This guide walks through the essentials, from how these systems protect your property to whether you can handle setup yourself.
Table of Contents
ToggleKey Takeaways
- A central alarm system unifies sensors, a control panel, and professional monitoring into a coordinated defense that provides 24/7 automated response whether you’re home or away.
- Core components include door/window sensors, motion detectors, glass break sensors, keypads, and a control panel that continuously monitors entry points and coordinates protection.
- Professional monitoring service is essential—without it, a central alarm system is just a noise-maker; with 24/7 monitoring, trained operators can dispatch emergency responders automatically.
- Wireless systems simplify DIY installation for renters and homes where you want to avoid structural changes, but require battery replacement every 2-4 years for optimal protection.
- Proper configuration of entry and exit delays prevents false alarms while maintaining security, and regular quarterly testing and battery maintenance ensure your system stays effective.
What Is a Central Alarm System and How Does It Work?
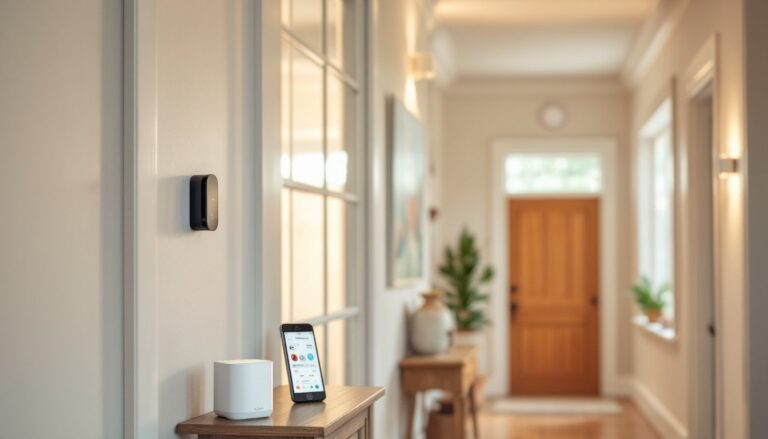
A central alarm system is a network of sensors, a control panel, and a monitoring service working together to detect and respond to intrusions. Think of it like a nervous system for your home: sensors throughout the house detect disturbances, send signals to the brain (the control panel), and trigger an alert or signal sent to a monitoring center.
When motion is detected or a door opens unexpectedly, sensors transmit a signal to the control panel. That panel recognizes the signal and either arms an audible alarm, sends a silent alert to a professional monitoring station, or both. Professional monitoring centers dispatch emergency responders if needed, a feature that makes a central system far more effective than a standalone siren you hear yourself. Unlike simple motion lights or doorbell cameras, a true central alarm system provides 24/7 automated response, whether you’re home, at work, or asleep.
The entire system relies on wired or wireless communication. Wired systems run cables through walls and ceilings to connect sensors and panels: wireless systems use radio frequencies, which simplifies installation but requires battery maintenance. Many modern systems use a hybrid approach: some hardwired components combined with wireless add-ons for flexibility. The control panel continuously monitors sensors. If it detects unauthorized entry or tampering, it triggers protocol, usually sounding a siren, contacting your monitoring service, and logging the event for your records.
Key Components and How They Protect Your Home
Every central alarm system has five core pieces working in concert. Without all of them functioning correctly, your protection is incomplete. Understanding each piece helps you choose the right system and spot problems if something fails.
Sensors and Detection Devices
Door and window sensors are the frontline defense. These magnetic switches consist of two parts: a magnet on the moving door or window and a reed switch on the fixed frame. When the magnet and switch separate (because the door or window opened), it breaks the circuit and sends a signal to the control panel. They’re cheap, reliable, and last for years with minimal maintenance.
Motion detectors (passive infrared or PIR sensors) look for heat signatures moving across a space. A person walking past triggers the detector, which signals the panel. These are essential for interior coverage, especially in rooms where windows are blocked or entry points are limited. PIR sensors need clear lines of sight and can occasionally false-trigger from pets or heat vents, so placement matters.
Glass break sensors listen for the distinctive frequency of breaking glass. When a pane shatters, the sensor picks up the acoustic signature and immediately alerts the panel. They’re often used on accessible ground-floor windows where breaking glass might precede entry.
Keypads let residents arm and disarm the system using a code. Most are backlit for night use and can be wired or wireless. They also display system status, armed, disarmed, battery low, sensor trouble.
The Central Control Panel
The control panel is the hub. It continuously monitors every wired and wireless sensor, interprets their signals, and decides what to do. A standard panel can handle 8 to 48 zones (individual sensors or groups of sensors), depending on size and cost. The panel runs on backup battery power: if your main power fails, it keeps running for 24 to 72 hours depending on battery capacity, critical since burglars sometimes cut power to disable alarms.
When the panel detects an alarm condition, it follows your preset protocol: sound the internal siren, send an alert to the monitoring service via landline or internet connection, and sometimes trigger smart home actions (lighting, locks). Most panels also log every event, so you have a timestamped record of all arm/disarm events and alerts.
The panel’s communication pathway is crucial. Older systems used phone lines: modern systems use internet or cellular backup. If your internet goes down, cellular steps in. This redundancy ensures your monitoring service stays connected even if a single connection fails, something worth verifying when comparing systems.
Choosing the Right Central Alarm System for Your Needs
Selecting a central alarm system depends on your home’s layout, your budget, and whether you want professional monitoring. Start by assessing your vulnerabilities: How many entry points do you have? Do you have large windows on ground level? Are interior spaces at risk? A small one-story home with 6 entry points might need fewer sensors than a split-level with 12 entry points and multiple sliding doors.
Wired systems offer reliability and zero battery concerns, but installation is labor-intensive, running conduit through walls, drilling holes, and running cable costs money if you hire an electrician. Wireless systems skip the drilling and are ideal for renters or homes where you don’t want to alter the structure. Trade-off: wireless sensors need battery replacement every 2-4 years, and if a sensor battery dies unnoticed, that zone becomes blind.
Monitoring service is the real differentiator. A system with no monitoring is just a loud noise-maker, useful as a deterrent but useless if you’re not home. Professional monitoring (usually $20–$40 per month in the US) ensures 24/7 response. When an alarm triggers, trained operators attempt to reach you: if they can’t confirm it’s false, they dispatch police. That response is the teeth your system needs.
Consider system size: you’re not installing something permanent, but you are committing to monthly service and hardware that needs to stay current. A bare-bones 4-zone system might cost $300–500: a comprehensive 10-zone system with professional monitoring could run $1000+ upfront plus recurring fees. Research Best Home Security Alarm: or check independent reviews at Good Housekeeping’s expert-tested security systems and Tom’s Guide’s 2026 security system rankings to compare options.
Installation and Setup Basics for DIY Homeowners
If you’re handy and your system is wireless or hybrid, DIY installation is feasible. Wired systems require running cable through walls, doable if you’re comfortable fishing wire through studs and patching drywall afterward, but not trivial. Before starting, check whether your local jurisdiction requires a permit for alarm system installation: some do, especially if the system ties into emergency dispatch. Call your local building department to confirm.
Prep Work: Sketch your home’s floor plan and mark all potential entry points, doors, windows, glass panels, garage entries. Mark where you’ll mount sensors (1–2 inches from the edge of the moving part) and where the control panel will live (central location, usually near the main entry or bedroom). Ensure you have clear line of sight for motion detectors and that wireless sensors will reach the panel. Thick walls and metal studs can block wireless signals: if range is tight, you may need a wireless repeater.
Installation Steps:
- Install door and window sensors first. Mount the magnet on the moving part (door or window sash) and the switch on the fixed frame, ensuring they align when closed.
- Mount motion detectors in high-traffic interior hallways or common areas, angled to watch doorways and room entries.
- Install the control panel in your chosen central location, preferably near a power outlet and phone/internet jack.
- Pair wireless sensors to the panel following the manufacturer’s instructions (usually a pairing mode accessed via keypad code).
- Mount a keypad near the main entry for arming and disarming.
- Test each sensor: walk past motion detectors, open doors and windows, and confirm the panel registers each event.
- Contact your monitoring service once everything is verified and working.
Safety and Best Practices: Wear work gloves when handling components: use a stud finder to avoid drilling into live electrical wires. If your home has knob-and-tube wiring (old cloth-wrapped wire), have an electrician assess before running new cable. Test your backup battery monthly by unplugging the panel and confirming it still powers the display and audible alarm for at least 30 seconds. Keep sensor batteries fresh, a dead sensor is an unmonitored entry point. Explore Home Alarm Repair: A if you run into issues, and browse Home Alarm Archives – Knitting TIME for troubleshooting tips.
Many homeowners find the most challenging part isn’t the hardware but configuring entry/exit delays and arming modes. Entry delay (usually 30–60 seconds) lets you disarm the system after opening a door. Exit delay (60–120 seconds) gives you time to leave before the system fully arms. Set these correctly, too short and you’ll false-trigger coming home: too long and you lose security. Your system manual or monitoring service can walk you through this step-by-step.
Conclusion
A central alarm system is a worthwhile security investment that transforms your home’s protection from reactive to proactive. Whether you install it yourself or hire a professional, the key is choosing the right system for your layout, committing to professional monitoring, and maintaining it properly. Keep sensors clean, replace batteries on schedule, and test the system quarterly to catch any drift or malfunction. Your home deserves a nervous system that never sleeps.