If you own a Mac and want real peace of mind at home, understanding how to use Ring the Alarm features is essential. Whether you’re securing a new property, upgrading your current setup, or simply exploring what modern Mac devices can do for home safety, this guide walks you through every step. Ring the Alarm isn’t just a catchphrase, it’s a practical security feature that integrates with Apple’s ecosystem to help you stay alert. We’ll cover how to activate it, configure it properly, and weave it into a comprehensive home safety strategy that actually works.
Table of Contents
ToggleKey Takeaways
- Ring the Alarm on Mac is a built-in security feature that leverages Find My, iCloud, and Notifications to alert you about unauthorized access, stolen devices, and security threats across your Apple ecosystem.
- Activate Ring the Alarm by enabling Find My Mac in System Settings, configuring Location Services, and customizing notification sounds and lock-screen alerts in Notifications settings.
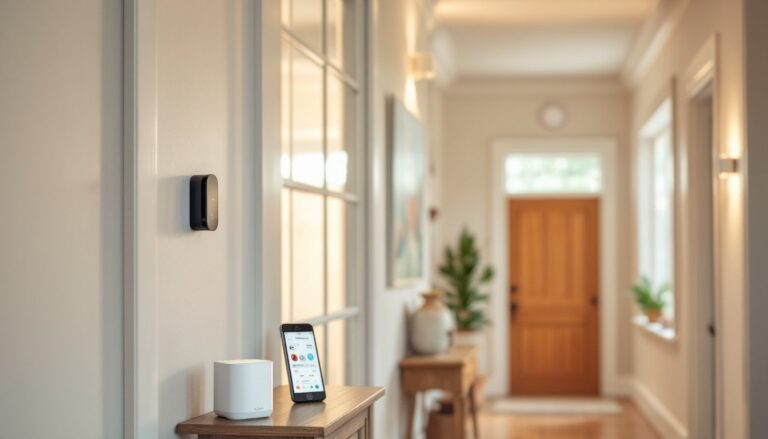
- Combine Mac ring the alarm features with HomeKit cameras, smart locks, and iCloud Keychain monitoring to create layered home security that aggregates alerts in one central location.
- Test your entire alarm system monthly by simulating events like unauthorized door access or motion detection to ensure alerts reach all family members and sounds play correctly.
- If alerts aren’t arriving, verify Wi-Fi connectivity, check that Do Not Disturb mode isn’t blocking notifications, ensure alert volume is above 50%, and sign out and back into iCloud to refresh connections.
- Ring the Alarm is ideal for renters and apartment dwellers since it requires no hardwiring—everything operates through Wi-Fi and your existing Apple devices.
What Does ‘Ring the Alarm’ Mean on Mac Devices?
The term ‘Ring the Alarm’ on Mac refers to Apple’s alert and notification system designed to warn you about potential security threats, system issues, or home-related events. It’s not a specific app, it’s a built-in capability that leverages Find My, Notifications, and security settings across your Mac, iPhone, iPad, and other devices.
When enabled properly, your Mac can send immediate alerts if someone attempts unauthorized access, if a device is lost or stolen, or if security-related events occur on your home network. Think of it as your Mac’s way of practically shouting at you when something needs attention. This differs from traditional alarm systems because it operates through your existing Apple devices and internet connection, making it seamless if you’re already in the Apple ecosystem.
The feature ties directly into iCloud and Family Sharing, meaning alerts can reach multiple household members simultaneously. If your Mac detects unusual login attempts, stolen device notifications, or network intrusions, it “rings the alarm”, literally, through sound, visual notifications, and alerts on all your synced devices.
How to Activate Ring the Alarm on Your Mac
Using Find My Mac Features
Start by opening System Settings (or System Preferences on older macOS versions) and navigate to your Apple ID account. Click iCloud and ensure Find My Mac is toggled on. This is the foundation, without it, your Mac can’t send or receive alarm alerts.
Next, go to Settings > Privacy & Security > Location Services and confirm it’s enabled. Your Mac uses location data to function with security alerts, though you can granularly control which apps access this information. Disable location sharing for apps that don’t need it.
Once Find My Mac is active, your device appears in the Find My app on any of your other Apple devices. If someone attempts to log in remotely or if unauthorized access is detected, your Mac can trigger an alert. You can also manually trigger an alarm from another device, useful if your Mac is lost or stolen.
Configuring Sound and Notification Settings
Go to System Settings > Notifications and search for “Find My” in the left sidebar. Here’s where you customize how alerts appear. Enable Allow Notifications, then choose Alert as the notification style (this keeps alerts front-and-center rather than quietly in Notification Center).
Under Sound, enable the alert sound, this is what makes the “alarm ring.” Choose a sound that’s distinct and recognizable: the default alert works well. You can test it immediately by clicking the Play button next to the sound option.
Enable Badges so your Mac’s Dock icon shows a red badge when there’s an unread alert. This catches your eye even if you miss the sound. Also toggle on Show on Lock Screen so alerts appear even when your Mac is locked, ensuring you never miss a critical security notification.
For Family Sharing members, each person in your family group can receive alerts about shared devices. Go to Settings > Family and verify that each member has notifications enabled for shared device alerts.
Practical Home Security Applications for Mac Users
Ring the Alarm integrates naturally with several real-world home security scenarios. First, use it alongside Smart Home features. If you’ve installed HomeKit-compatible cameras, locks, or sensors, your Mac can send alerts when motion is detected near entry points or when door locks are engaged remotely.
Second, leverage iCloud Keychain security alerts. Your Mac monitors password breaches and unusual account activity. When Ring the Alarm detects compromised credentials or login attempts from unfamiliar locations, it alerts you immediately, giving you time to change passwords before damage occurs.
Third, combine this with a Ring Home Alarm System: A Comprehensive Overview to create layered protection. While Find My alerts handle device security, a dedicated smart alarm system manages door sensors, motion detectors, and siren activation. Your Mac becomes the notification hub, receiving and displaying alerts from all sources in one place.
Many homeowners also use Schedule Away mode: when you set your Home to Away in the Home app, your Mac auto-mutes notifications for minor events but rings the alarm for genuine break-ins or unauthorized entries. This prevents false-alarm fatigue while keeping you safe.
For renters or apartments, this approach is ideal because it doesn’t require hardwiring or permanent installation. Everything works through Wi-Fi and your Apple devices, making it portable if you move.
Troubleshooting Common Ring the Alarm Issues
Problem: Not receiving alerts even though enabling Find My Mac.
First, verify your Mac is connected to Wi-Fi and signed in with your Apple ID. Alerts won’t transmit if iCloud connection drops. Check your internet by opening a web browser, if pages load fine but alerts aren’t arriving, restart your Mac and re-enable Find My from System Settings.
Second, confirm notifications aren’t muted. Press Control + Shift + Equals on your keyboard to temporarily unmute system sounds, then test an alert. If you use Do Not Disturb mode, disable it during critical hours or add Find My to your Focus exceptions.
Problem: Sound isn’t playing when an alarm triggers.
Check your Mac’s volume level in the menu bar (click the speaker icon). If it’s muted or very low, increase it. Next, go to System Settings > Sound > Alert volume and ensure it’s set above 50%. Some Macs have separate system and alert volume controls, adjust both.
Also verify that your Mac’s audio output is set to speakers, not external devices. If you use external speakers or a connected display with audio, the alert may be routing there instead.
Problem: Alerts arrive on iPhone but not Mac.
Make sure your Mac is running the latest macOS version (check System Settings > General > Software Update). Older macOS versions sometimes miss Find My alert features. Also confirm your Mac and iPhone are on the same Wi-Fi network or that your iPhone has cellular enabled, alerts sync through iCloud, so connectivity matters.
If alerts still don’t arrive, sign out of iCloud on your Mac (System Settings > Apple ID > Sign Out) and sign back in. This refreshes the connection and often resolves sync issues.
Integrating Mac Alerts Into Your Home Safety System
Think of your Mac as the control center for home security alerts. Since it stays powered longer than most devices and sits in a central location, it’s the perfect hub for aggregating notifications from multiple sources.
Start by enabling HomeKit Secure Video if you have a compatible camera (like Logitech Circle View or Eve Secure Door). Your Mac receives alerts whenever the system detects people, animals, or vehicles near your home. You can then manually trigger Ring the Alarm or escalate the alert to a smart speaker for an audible warning.
Next, set up HomeKit automations on your Mac. Use the Home app to create rules like: “When the front door lock detects an unauthorized attempt, send a notification and activate a siren on the HomeKit Speaker.” Your Mac orchestrates these automations and ensures alerts reach every family member’s device.
For tech-savvy users, integrate third-party alerts through Shortcuts. Create a custom automation that monitors a door sensor, motion detector, or security camera feed, then have it trigger a Mac notification with custom sound and message. This allows you to customize alert behavior beyond Apple’s defaults.
Finally, test your entire system monthly. Simulate an attempted break-in: unlock a door sensor or trigger a camera motion alert. Verify that every device in your home receives notifications, that sounds play, and that you can respond quickly. A system you haven’t tested is one you can’t trust when you need it most.
Many homeowners pair this with a cloud backup or video doorbell reviews from CNET to see what’s happening even when alerts alone aren’t enough. This layered approach, Mac notifications plus video confirmation, gives you both speed and situational awareness when something goes wrong.