A wired home security system remains one of the most reliable ways to protect your property, even though the rise of wireless alternatives. Unlike battery-powered sensors, wired systems draw power from your home’s electrical infrastructure, offering consistent operation without worrying about dead batteries or signal dropout. If you’re building a new home, renovating, or simply want rock-solid protection, a wired alarm system delivers the dependability that many security-conscious homeowners prefer. This guide walks you through what wired systems are, how they work, whether one makes sense for your home, and how to plan an installation that fits your security needs.
Table of Contents
ToggleKey Takeaways
- A wired alarm system provides reliable, consistent home security by drawing power from your electrical infrastructure, eliminating dead batteries and signal dropout concerns.
- Wired systems cost less over time than wireless alternatives because they eliminate the need for battery replacements every 3–5 years, making them ideal for long-term security planning.
- Proper installation planning—mapping entry points, positioning sensors strategically, and using correct low-voltage cabling—ensures your wired system covers all vulnerabilities without gaps in coverage.
- Motion sensors require careful placement away from windows and heat vents, and should include pet immunity settings if needed, while all contact sensors must be tested monthly to confirm reliable operation.
- A wired alarm system integrated with professional monitoring services can qualify you for insurance discounts while providing remote diagnostics and peace of mind that wireless systems often struggle to match.
- Regular maintenance such as testing monthly, cleaning sensors, and replacing backup batteries every 3–5 years keeps a wired alarm system functioning reliably for 15+ years without major upgrades.
What Is a Wired Alarm System and How Does It Work?
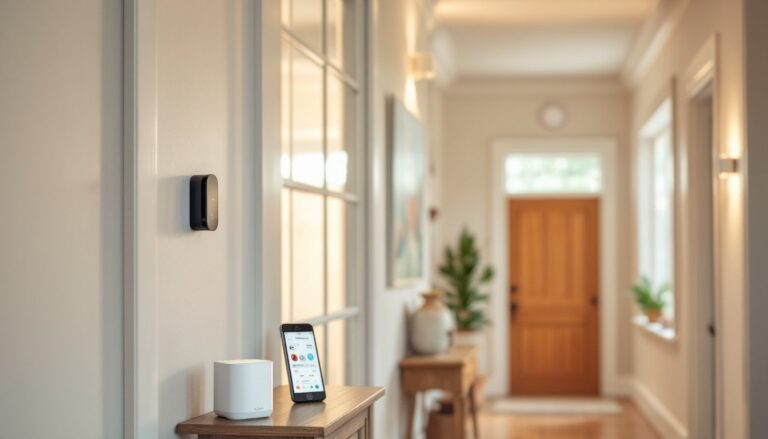
A wired alarm system connects door and window sensors, motion detectors, and a central control panel through hardwired cables running through your walls. When a sensor detects a breach, say, a door opening when it shouldn’t, it completes a circuit that sends a signal to the panel. The panel then sounds an alarm, alerts you via app or call, and notifies your monitoring service if you’re subscribed.
The core components are straightforward. Door and window sensors (called “contact sensors”) are typically magnetic switches, when the magnet separates from the switch, the circuit breaks and triggers an alert. Motion sensors use infrared technology to detect movement: some can distinguish between a pet and a human. The control panel is your system’s brain, managing all sensors and coordinating responses. Finally, a backup battery (usually a 12-volt system) keeps the panel running if power fails, a critical safeguard.
Wired systems run on low-voltage wiring, typically 18 to 22-gauge stranded copper cable. This isn’t your household 120-volt wiring: it’s safe to handle and install without an electrician’s license, though local codes vary. The cable runs through walls, attics, and crawlspaces, connecting each sensor to the panel via a series loop or star topology (where every sensor has its own cable run). A series loop is cheaper but slower to diagnose faults: a star topology costs more to install but offers faster response.
Key Benefits of Choosing a Wired System
Reliability and power consistency are the biggest wins. Because wired sensors draw power from your electrical system, you never face dead batteries or failed connections. This matters when you’re away or asleep, your system is always on, always alert.
Lower long-term costs make wired systems attractive. Wireless systems demand battery replacements every few years: wired systems eliminate that expense entirely. Monitoring fees are comparable, but you won’t field support calls about low-battery warnings.
Integration with home automation is simpler with wired systems. Many modern panels support smart home protocols, allowing you to arm/disarm via smartphone, receive real-time notifications, and monitor your system from anywhere. A wired backbone also means fewer wireless interference issues, your cameras, thermostats, and smart locks won’t compete for bandwidth.
Stronger signal reliability comes with a hardwired setup. Radio frequency interference from neighboring networks, appliances, or weather is eliminated. Your sensors communicate directly with the panel at the speed of electricity, not radio waves traveling through walls and floors.
Insurance discounts often accompany professionally monitored wired systems. Many insurers recognize the reduced theft and break-in risk and reward you with lower premiums. Check with your agent before installation to confirm eligibility.
Wired vs. Wireless: Which System Is Right for Your Home?
Wireless systems excel if you rent, want a fast installation, or don’t want to fish cables through existing walls. They’re cheaper upfront and don’t require cutting into drywall. The trade-off? Batteries need replacing every 3–5 years, radio frequency can drop signals in heavy concrete homes, and setup is DIY-heavy, which sometimes leads to gaps in coverage.
Wired systems shine in new construction, full renovations, or older homes where you’re already opening walls. Installation takes longer and costs more initially, you’re paying for labor and materials to run cable, but the system’s lifespan extends 15+ years with zero battery maintenance. If you have a wired home security system professionally installed, the company handles the heavy lifting, and you get a warranty backing the work.
Hybrid approaches combine both. Run wired sensors on entry points (doors, main-floor windows) and add wireless motion sensors or glass-break detectors where running cable is impractical. This balances coverage, cost, and convenience. Many modern control panels support both wired and wireless sensors on the same network, giving you flexibility.
Consider your home’s age, your timeline, and your tolerance for future maintenance. New builds and major remodels? Go wired. Renting or in a loft with concrete walls? Wireless might be your best bet. Unsure? A hybrid approach hedges your bets and often offers the best security-to-cost ratio.
Planning Your Wired Alarm Installation
Assessing Your Home’s Security Needs
Start by walking your property like an intruder would. Where would you try to enter? Front door, back door, garage entry, basement windows? Jot down every potential access point. Ground-floor windows are higher priority than second-story ones: corner windows and those hidden from the street are common targets.
Next, consider your lifestyle. Do you work nights? Travel frequently? Have pets that roam? These details shape where motion detectors should go. A family with a large dog needs sensors positioned high (above the dog’s head) or configured to ignore pets, many have a pet immunity setting that works up to 80 pounds.
Budget also influences your plan. A basic system (main entry points plus one motion detector) costs less than a comprehensive setup covering every window and interior zone. Talk honestly with a professional installer or your monitoring company about your priorities. They’ll help you balance security and cost.
Choosing Entry Points and Sensor Placement
Every exterior door and ground-floor window should have a contact sensor. This includes garage doors and interior basement entries that connect to the outside. Don’t skip them, most break-ins come through doors, not windows.
For placement, ensure sensors are clean and properly gapped. If your door frame is warped, a sensor may fail to register a close. Test every sensor after installation, most panels have a test mode that confirms signal without triggering an alarm.
Motion sensors work best in central locations with clear sightlines. Place one in your main living area, kitchen, or hallway where intruders are likely to pass. Avoid pointing them at windows (sunlight can cause false alarms) or heater vents (temperature changes confuse infrared detection). Most motion sensors have an adjustable sensitivity dial: start at medium and adjust if you’re getting false triggers.
For wiring runs, plan cable paths before you start cutting. Use existing conduits (behind baseboards, under stairs, through crawlspaces) wherever possible. If drywall cuts are unavoidable, mark studs and joists first and run cable vertically or horizontally along framing, never diagonally through floor cavities where nails might puncture it. Use low-voltage cable staples every 16 inches to secure runs: don’t use regular staples, which can crush the wire insulation.
A basic home alarm system typically uses 18-gauge or 22-gauge stranded copper cable. Solid-core cable is cheaper but prone to breaking during bends: stranded is more forgiving and industry-standard for security applications. Buy spares, you’ll always need a bit more than your estimate.
Consider hiring a professional for the heavy wiring work, especially if it involves running cable through finished walls. If you’re doing it yourself, rent a fish tape (a flexible rod that guides cable through wall cavities) rather than trying to push cable blind. It saves frustration and prevents damage.
Maintenance and Troubleshooting Tips
Wired systems are low-maintenance, but a few checks keep them running smoothly. Test your system monthly, most panels have a test mode that confirms all sensors without triggering the alarm. Replace the backup battery every 3–5 years (mark the date on the panel with a permanent marker so you don’t forget).
Inspect sensors for dust and debris. Door and window sensors accumulate dust: a soft brush and isopropyl alcohol on a cloth cleans the lens on motion detectors. If a sensor stops reporting, check the cable connection at the panel, sometimes vibration or rodent damage loosens a terminal.
Common issues and fixes:
- Sensor not reporting: Check the cable for cuts or pinches. A voltmeter ($10–15) confirms signal is reaching the sensor. If wiring is damaged, you may need to run a new line or splice it (use low-voltage connectors, not tape).
- False alarms from motion sensors: Adjust sensitivity lower, reposition the sensor away from vents or sunlight, or enable the pet-immunity feature if available.
- Backup battery warning: This is normal after 3–5 years. Home alarm repair professionals can swap it in minutes, or you can order a replacement from your panel’s manufacturer and do it yourself if you’re comfortable with basic tools.
- Panel beeping intermittently: Usually indicates a low battery or a zone malfunction. Check the panel’s display for error codes, which your manual will explain.
If you subscribe to professional monitoring, your service can run remote diagnostics and alert you to issues before they become problems. It’s worth the modest monthly fee for that peace of mind alone. For comprehensive guidance on selecting and maintaining your system, reputable sources like Tom’s Guide offer detailed equipment reviews and comparisons that can help you make informed decisions. Similarly, Digital Trends regularly covers home security technology trends and equipment updates that stay current with industry changes.
Wired systems do occasionally need professional service, if you suspect tampering or a persistent malfunction, call your monitoring company or a licensed installer. The cost of a service call ($100–150) beats replacing a system that’s become unreliable.
Final Thoughts
A wired alarm system offers the dependability and long-term value that justify the upfront investment and installation effort. Whether you’re retrofitting an existing home, building new, or doing a major renovation, planning your wired system around your home’s layout and your security priorities ensures you get coverage where it matters most. Take time during the planning phase, don’t skip the backup battery, and test regularly, and you’ll have a system that protects your home for 15+ years without the hassle of battery replacements or signal dropouts.